Add to Favourite

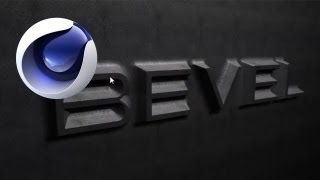
Cinema 4D: Super Bowl Ident Tutorial Part 1
Views: 19101
Likes: 197

In this Super Bowl tutorial VideoFort Don shows you how to create a ‘Sports Ident’ similar to the one displayed in our Thumbnail! This is a four part tutorial. In part one, you will learn how to set up the main animation, focusing on the Text reveal effect. In order to understand the lighting, rendering, texturing and other details, be sure to check out the rest of the tutorials!...
  • 1 Students
Watch Now
Add to Favourite

After Effects: Pac-Man Part 2- Masking and Animating Pac-Man
Views: 19012
Likes: 58

In this http://www.VideoFort.com After Effects Pac-Man tutorial series VideoFort Jon gives a in depth looks at motion graphics and layering, teaching how to recreate the classic Atari game, Pac-Man. In Pac-Man Part 2 VideoFort Jon covers how to keyframe Pac-Man’s mouth to open and close. Start out by bringing the “BoardandCharacters.png” into your Game comp. From there you will right click on the layer and choose to Pre Compose it, leaving all attributes in the comp, and name it “Pac-Man”. Open the Pac-Man pre-comp by double clicking on it, this brings you into the pre-comp. Select the “BoardandCharacters.png” layer and rename it “1”. From there you will create a mask, using the Rectangle Tool, around the larger, filed in Pac-Man (yellow circle) in the top right corner of the png. Duplicate this layer and shift the mask left until the partially open Pac-Man is revealed. Notice how the layer is renamed “2” automatically. Once you have the mask where you’d like it, duplicate this layer and shift the mask left to reveal the final, wide open Pac-Man. Notice how the layer is renamed “3” automatically. You need to center the Anchor Points for each layer using the pan behind tool........
  • 1 Students
Watch Now
Add to Favourite

Cinema 4D: Create a Beveled Text Effect
Views: 17906
Likes: 132

VideoFort Don is back with this tutorial on how to add a professional looking bevel to text or logos in Cinema 4D. This particular tutorial will teach you how to create the look that your text has been punched out of a piece of sheet metal. Some techniques covered include text splines, letter spacing (kerning), and using the NURBS tools to create 3D text. Don also demonstrates how to use the ‘Chamfer’ tool to create rounded edges, apply textures to objects, and create a seamless look between 3D text and a background plane. Don will teach you how create smooth seams between your text and background layer in a flash. A perfect compliment for your next text-heavy or logo animation project that you can complete in mere minutes! For more free vfx tutorials please visit http://www.VideoFort.com. VideoFort: The first ever Royalty Free Stock Footage Library to offer Unlimited Downloads of all HD Video Clips. VideoFort empowers creative freedom by giving film and video makers access to one of the best stock footage resources on the planet. VideoFort is the first all HD subscription-based stock footage provider to offer its members unlimited access to some of the world’s most exclusive content........
  • 1 Students
Watch Now
Add to Favourite

Cinema 4D: Draw Tracer Tails Trailing Objects
Views: 15729
Likes: 113

In this tutorial VideoFort Don teaches you how to make tracer trails using Cinema 4D’s tracer object. Start off by choosing a star shape and set your keyframes for the motion. From there go to the MoGraph menu and choose tracer and in tracer object atributes drop your star shape in the trace link section, if its not in there already. Then create a circle and drop both the circle and star into a sweep NURBS object. From there Don shows you how to refine the tracer trails by going into details section of the Sweep NURBS object....
  • 1 Students
Watch Now
Add to Favourite

Cinema 4D: Light Flicker Effects
Views: 15705
Likes: 121

Learn how to create a flickering text effect using Cinema 4D. VideoFort Don shows you how to create flickering text by creating a text layer and dropping it into extrude NURBS. From there you duplicate the text, create a circle (approximate radius 2 cm), and drop both those into a sweep NURBS layer. Now you have a 3D text to add a flicker effect. From there you create a luminance layer and drop it on the sweep NURBS layer. To create the flicker effect you will turn on and off the sweep NURBS layer’s visibility by setting keyframes in the timeline....
  • 1 Students
Watch Now
Add to Favourite

Cinema 4D: Grow Effect Tutorial
Views: 15364
Likes: 91

In this tutorial, VideoFort Don demonstrate how to create a growing effect using Cinema 4D. The objects that he uses in this tutorial are all created in Cinema 4D. He starts of by adding a cube object to the composition. Next, select “Cloner” to clone the cube under MoGraph. Change the Mode of the Cloner to “Grid Array” and turn down the size of the cubes. Make the Cloner larger by pulling the cubes away from each other. Elongate the cubes on the x-axis and increase the count of the cubes. Under MoGraph select Effector and select “Random” to randomize the squares. To add more randomness, change the rotation under the parameter settings. Next, enable the “Gouraud Shading” in the display settings. This will help you see your shapes better. Be sure to remove the “Grid” under the filter settings. Next, insert a “Plain” by going to Effector under MoGraph. Switch the position off under the parameter settings. Select “Uniform Scale” and set the value to “-.99” to create microscopic cubes. Drag the plain layer into the Effector under the “Random” layer. Insert a second “Plain” by going to Effector under MoGraph. Switch the position off under the parameter settings........
  • 1 Students
Watch Now
Add to Favourite

After Effects: Create Swirls
Views: 15193
Likes: 72

After Effects Tutorial VideoFort Jon creates swirls using Adobe Illustrator, then shows you how to imports the ai file to create a swirly animation. Start out by creating a 1920×1080 pixels, color mode RGB project in Adobe Illustrator. Then grab the Pen Tool, create two points, and make the line curved. Next grab the spiral tool (right click on the line tool) and create a spiral near the curved line. now select an endpoint on the curved line and the end point for the spiral and go up to Object_Path_Join. This will join the line and spiral. Select this layer and name it Stem. Now create a few layers. Each layer will have its own spiral branching off from the stem. Name each new swirl “Branch” with corresponding number. Once you have the spirals created select everything by Drawing a box around it. With everything selected make sure there is no fill color, only a black stroke. From there go to your paint brushes and select the charcoal brush (or any brush of your choice). Save this Illustrator project as Swirls.ai and open up After Effects. Create a new comp 1920×1080, 24 fps, duration 10 seconds and name it Swirly........
  • 1 Students
Watch Now