Add to Favourite

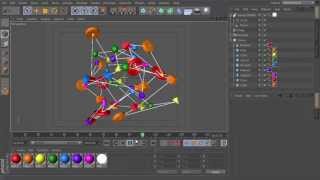
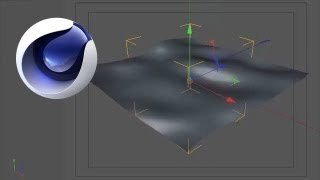
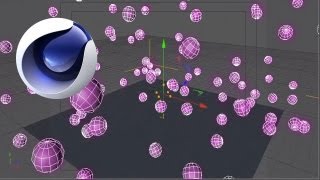
Cinema 4d: Particles To Text Effect
Views: 35388
Likes: 495

In this http://www.VideoFort.com tutorial we show you how to create a particles to effects animation in cinema 4d. Filmmakers, Cinematographers, and Videographers are using VideoFort.com’s high definition stock footage library to increase entertainment value and achieve more creative freedom than ever before. Content creators love VideoFort.com because we always give you the best. VideoFort gives you unlimited downloads to epic HD and Ultra HD stock footage which is always 100% royalty free. Members of VideoFort.com get one of a kind stock footage and instant access to Hollywood Quality Production Value. With unlimited downloads to exclusive HD videos, VideoFort is giving you the power to exercise your creative genius. Because our stock footage is always 100% royalty-free, there are no hidden fees or additional payments. It’s so easy. Go to VideoFort.com, download thousands of HD Video Clips, and explore the possibility of making videos with the best content on the planet. Your membership to VideoFort will enable you to produce content like a pro –Hollywood’s Award winning Film & TV productions work with VideoFort personnel all the time, now you can too. Remember, the footage on VideoFort.com is made by some of the world’s best cinematographers and the award winning high.......
  • 1 Students
Watch Now
Add to Favourite

Cinema 4D: Connect Objects
Views: 34743
Likes: 256

In this tutorial VideoFort Don teaches you to connect elements with a spline using Cinema 4D. Start out by adding objects to a cloner. Set the cloner mode to “Radial”, and the clones to “Iterate”. You can also apply materials to your objects to give them color, VideoFort Don chose a spectrum. After you have applied the materials to your objects, set keyframes for the count and radius for the cloner. From there you will select your cloner and add the Random MoGraph effector and then change the parameters of the Random effector. To smooth out the animation add a Delay effector. To link all your objects together, click on the Cloner and add a MoGraph Tracer. Make sure the tracking mode is set to Connect Elements. Then you need to add a Circle, and Sweep NURBS object. Set the Circle’s radius to about 2 cm and add the Circle and Tracer to the Sweep NURBS object, with the circle above the Tracer. Add a white material with a luminance to the Sweep NURBS object for added effect and you are finished!...
  • 1 Students
Watch Now
Add to Favourite

After Effects: Basic Title Creation Part 1
Views: 34434
Likes: 142

  In this After Effects Tutorial VideoFort Jon shows you how to create a basic dynamic Title Intro using After Effect’s 3D capabilites. Start out by creating the text layer “VideoFort” and place it in the center of the comp. VideoFort Jon shows you different Animation Presets After Effects has to offer. Apply one by going into the Effects and Presets window and select Animation Presets, then Text. You can find many different preset animations here. Move around the keyframes as you please to alter the animation. Now remove any animations you have applied, and drag the VF logo to the left of the “VideFort” text. Highlight both the VF logo and “VideoFort” text layers, then right click and precompose. Name the Pre-Comp “Logo”, then open it up. Duplicate the “VideoFort” text layer, move it underneath the “VideoFort” text layer and change the text to “Tutorials”. Go back into your main comp, and turn on the 3D controls for the “Logo” pre-comp. Add a new solid layer, place the CC Particle World effect on to it, and rename it “Particles. Now add a camera. You can alter the CC Particle World settings how you want and move the camera around.......
  • 1 Students
Watch Now
Add to Favourite

Cinema 4D: How to Grow a Tree Part 2
Views: 34227
Likes: 165

In this tutorial VideoFort Don shows you how to animate the tree you designed previously, using Cinema 4D. First, you select the specific ‘hair’ you would like to animate. You then click the basic tab and ensure that length is enabled. You then control what percentage of the hair you want to appear at specified time points along your timeline. You repeat this process with any hairs you want too animate....
  • 1 Students
Watch Now
Add to Favourite

Cinema 4D: Use Effectors on Any Object
Views: 31376
Likes: 215

In this tutorial VideoFort.com Don teaches us how to quickly set effectors using a primitive plane in Cinema 4D. Although effectors are often used on MoGraph Objects, they can be used to effect any object. After selecting a primitive plane to effect, VideoFort Don chooses a random effector and makes it the child of the object being affected. He then chooses a polygon deformation, and sets the effector’s random mode to noise....
  • 1 Students
Watch Now
Add to Favourite

After Effects: Export Using Adobe Media Encoder
Views: 29362
Likes: 171

In this tutorial, VideoFort BT will teach you how to maximize your time by exporting using the Adobe Media Encoder. VideoFort is one of Hollywood’s largest manufacturers of HD and Ultra HD Stock Footage. VideoFort footage is produced and created by world-renowned cinematographers, including some of the planets most experienced second unit crews. You’ve seen VideoFort’s content in Blockbuster Movies, Award Winning TV Shows, and Broadcast TV Commercials....
  • 1 Students
Watch Now
Add to Favourite

Cinema 4D: Speed Up & Slow Down
Views: 29056
Likes: 338

VideoFort Don shows us how to make a group of spheres explode, slow down, then return to speed. Start out by setting a floor and sphere in a new project, from there you clone the sphere into a grid and put a random effector on it to make it less uniform. Your plane and cloner layers need to be set to rigid body and the cloner’s individual elements need to be set to all, this will allow the spheres to move freely instead of as a group. VideoFort Don then shows us where and how to set keyframes using timescale to create the slow down and speed up motion....
  • 1 Students
Watch Now
Add to Favourite

Introduction to VFX
Views: 27389
Likes: 32

Kickstart your career in VFX – No Film School and No VFX Experience required! Have you ever wanted to do your own Visual Effects or maybe dream about working for a major VFX Studio in Hollywood? Well now you can learn all the basic skills to get you started! This course will give you the all building blocks that will allow you to start using Adobe After Effects, 3dsmax and also PFTrack to create your own amazing Visual Effects – Hollywood Style. You will also get to use the amazing V-Ray Renderer for 3dsmax which is used widely in the VFX industry as well as in the Gaming world! What you will learn: Autodesk 3dsmax Creating Geometry Subdivision Modeling Animation and Keyframes Texuring and the Material Editor The Activeshade Renderer The V-ray Renderer MassFX Physics Engine Lighting and Shadows The Graph Editor Importing 3D Models How to use Tracking Data from PFTrack Rendering Adobe After Effects After Effects Basics Working with Layers Applying Effects to Layers Masks & Rotoscoping Compositing Animation and Keyframes Color Grading Chroma Keying Tracking (2D and 3D) and much more!! PFTrack User Track and Auto Track nodes Solving the Camera Orienting The Scene Using Test Objects.......
  • 47Lessons
Watch Now