Add to Favourite

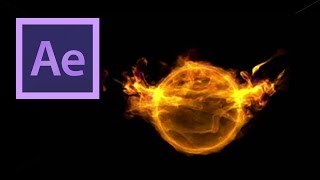
After Effects: Flame Ball Creation Tutorial
Views: 73579
Likes: 454

In this tutorial VideoFort Don shows you how to create a graphic of a flaming ball using trap code in Adobe After Effects. You begin by creating a new solid and adding the form effects to that solid. You adjust the form effects until you get the shape of an object you would like. After designing the image, you adjust the direction the flames will be moving. From here you add color and fine tune your image....
  • 1 Students
Watch Now
Add to Favourite

After Effects: Using the Speed Graph Editor
Views: 66392
Likes: 183

  In this After Effects Tutorial VideoFort Jon give a quick overview on how to use the Speed Graph Editor. With a new Comp created, add a text layer and set up some position keyframes. Once you have the positions keyframed, highlight the keyframes and press F9 on your keyboard. This will change them to Easy Ease (bezier keyframes), and smooth the motion of your text. Now, with Position selected in the transform controls, select the Graph Editor in your Comp Window (looks like a square with a squiggly in it, next to the Auto-Keyframe button). You should get a graph of the positions you keyframed. Right click in the graph and select speed graph editor. You should get something that looks like a bell curve. You can play with these curves to change the velocity of the text.Be sure to turn on Motion Blur and your text will become ultra dynamicl. What cool effects videos do you create? Post in the comments below! Be sure to Like, Subscribe and head to http://www.VideoFort.com to use amazing videos for your projects!...
  • 1 Students
Watch Now
Add to Favourite

Cinema 4D: Animated Frost Effect Tutorial
Views: 63937
Likes: 562

In this tutorial VideoFort Don shows you how to create an animated frost effect that progressively forms on your 3d objects just as real frost forms onto objects in real life. You begin with any image that you are able to add texture to. Next you create a new texture using the image of your desired texture. You then adjust the colors of your texture using filters. Once the colors are adjusted accordingly, you copy your texture and place it in the ‘Alpha Channel’ to place the texture on your original image....
  • 1 Students
Watch Now
Add to Favourite

After Effects: Randomize Text
Views: 54161
Likes: 358

In this After Effects Tutorial VideoFort Jon show you how to use an Animation Text Preset to generate random letter into a word. Start out by creating a new comp and adding a text layer. Then drop down the text transform options, select the arrow next to Animate on the right side, and choose Character Offset. Now you can apply a wiggle expression to the Character Offset value. Option click on the Character Offset stopwatch and type “wiggle(4,40)” This should make your text start being random. Now you need to keyframe the offset value underneath Range Selector and you can have the random text stop when you want. Make other adjustment as need to the different values to create more dynamic effects! What cool effects videos do you create? Post them in the comments below! Be sure to Like, Subscribe and head to http://www.VideoFort.com to use amazing videos for your projects!...
  • 1 Students
Watch Now
Add to Favourite

After Effects: Letter Explosion Part 1
Views: 52032
Likes: 302

In this tutorial VideoFort John will teach you how to create an explosion using particles and letters. In part one, we will teach you how to create the initial explosion, how to control the path your particles scatter into, and how to render the video so that you are able to add more effects. To see the other effects, check out Part 2 on our page!...
  • 1 Students
Watch Now
Add to Favourite

After Effects: Using Basic Expressions
Views: 42842
Likes: 132

  In this After Effects Tutorial VideoFort Jon teaches you the basics of Expressions by starting out with the Wiggle expression. An expression in After Effects can be used in lieu of keyframing to animate layers. Start out by loading your footage into the comp. Then drop down the transform controls and select Position. Then go up to effects and select add expression. In the comp timeline, next to position, transform.position should appear. Delete this and type in wiggle(5, 10). This will make the layer move 5 times in one second, by a factor of five pixels. From here you can alter either value as you please. If you want to specify a start point for your expression you need to add a Slider Control from the Effects. From there you will need to delete the 10 value and with the cursor in place of the 10, select the Expression Pick Whip and select the slider control. You will notice another expression has been added in place of the 10. Now you can use the Slider Control to keyframe the expression. Expressions can be used anywhere you can keyframe. Show us what you can create by posting your projects in.......
  • 1 Students
Watch Now
Add to Favourite

Cinema 4D: Cobblestone Logo Effect
Views: 37840
Likes: 297

In this tutorial VideoFort Don shows you how to create a dramatic cobblestone logo effect in Cinema 4D using displacement maps . In the first step you need to create a large plane for the ground and an Icosahedron sphere that slightly intersects the ground. Next, using the deformers tab, create a collision deformation allowing the sphere to press into the ground layer. Now create the text you would like to use or insert the logo file you wish to transform. Make sure to rotate the text or logo to be flat with your ground level and centered in the dent you created. You will then create another collision from the ground level to your text, in the opposite direction of the original dent using the inside stretch option in the collisions tab. Next, you can add texture and shadowing. To finish, you can fine tune your image using different masking, blurring, lighting, and other similar tools....
  • 1 Students
Watch Now