Add to Favourite

Cinema 4D: Breaking Objects Tutorial
Views: 240101
Likes: 2258

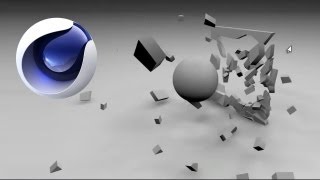
In this video tutorial, VideoFort Don demonstrates how to break a 3D object without using a third party plug-in using Cinema 4D. By the end of this tutorial, you will learn how to create a 3D breaking object using a 3D space . VideoFort Don starts off by creating the 3D objects used in the composition. These objects consist of a flat plain and a sphere. Next, he adds movement to the spherical object through the flat object that we will be breaking. In polygon mode, VideoFort Don uses the knife tool to create segments on the flat plain. The segments are then subdivided and fractured to cut the geometry of the flat plain apart. Then, set the mode under the fracture from straight to explode segments. Right-clicking on the plain, selecting Disconnect, and unchecking “Preserve Groups” will separate the segments. Under Collision, select “Individual Elements”. By default, this is turned off, so you need to turn in on to “All”. Next, we want to prevent the plain from falling and breaking immediately. Under the dynamics section, there is a control called Trigger. By default, it is set to “Immediately”, you need to change it to “On Collision”. This will.......
  • 1 Students
Watch Now
Add to Favourite

After Effects: Flame Logo Effect
Views: 156378
Likes: 964

In this tutorial VideoFort Don shows you how to set a logo on fire using Adobe After Effects. First, you will create your composition and set a default background. Next, you cut out the square where you want your logo to be placed using the rectangle tool. In order to create more detail, you can then add masks, feathering, and utilize any other effects available. You will then color the backgrounds in order to get the desired look. Next you place your logo above your square and add any desired effects as mattes on top of your logo. Once the desired look of the logo is achieved, details such as smoke and embers can be added to add aesthetics....
  • 1 Students
Watch Now
Add to Favourite

Adobe Premiere Pro: How to Use Warp Stabilizer
Views: 138549
Likes: 913

In this tutorial, VideoFort Brendan will teach you to how to use Warp Stabilizer plus other tips and tricks in Adobe Premiere Pro. VideoFort is one of Hollywood’s largest manufacturers of HD and Ultra HD Stock Footage. VideoFort footage is produced and created by world-renowned cinematographers, including some of the planets most experienced second unit crews. You’ve seen VideoFort’s content in Blockbuster Movies, Award Winning TV Shows, and Broadcast TV Commercials....
  • 1 Students
Watch Now
Add to Favourite

After Effects: Animate A Traveling Dotted Line
Views: 119767
Likes: 473

In this http://www.VideoFort.com After Effects Tutorial VideoFort Jon animates a red dotted line across a map, a popular technique for a travel transition. Start out by bringing in a picture of a map. You can use a screenshot of Google maps, but make sure to get permission and give them credit if you use it professionally. From there create a new comp 1920×1080, 24 fps, duration 8 seconds. Position the map on the comp and create a new shape layer. Select the Pen tool and make sure you have no fill selected, and your stroke is set to solid with the color of your choice. From there create the points where you want the line to from. Once you have the points set, drop down the Transform controls for the shape layer. Next Contents you’ll see an arrow, click that and select Trim Paths. Now drop down the Trim Paths options and set a keyframe at the beginning of the comp for 0% on the End value. Then move forward 4 seconds and set a keyframe for 100% on the End Value. It you RAM Preview, you will see the line animate across the map. Now drop down Shape_Stroke and.......
  • 1 Students
Watch Now
Add to Favourite

Cinema 4D: How to Grow a Tree part 1
Views: 110820
Likes: 652

In this tutorial VideoFort Don shows you how to make a tree grow using the program Cinema 4D. In part one, we will show you how to create the image of the finalized tree. To create this image, you begin by creating an image of small plane that will be used as the base of the tree. You then make the plane editable and using the ‘hair tool’ you add hair to your plane. Next you turn off the dynamics so that the hairs you use in your image do not fall down with gravity and then you change root of your hairs to be in the center of our polygon. After this, you are ready to create the tree using the ‘Generate’ tab which allows you to add volume to the image. Once your desired image is designed, you are then ready for Part 2, animating the growth of your tree....
  • 1 Students
Watch Now
Add to Favourite

Add Digital Elements: How to Track and Replace
Views: 86074
Likes: 581

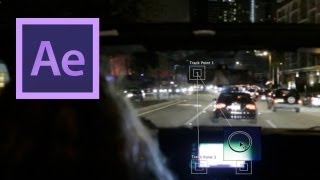
  After Effects tutorial VideoFort Jon covers how to replace a cars LCD screen using tracking data. Start out by creating a new comp the same dimensions as your footage. Then go to the Animation menu and select Track Motion. Make sure to change your track type to Perspective Corner Pin, this will change the track point from a single point to 4 points, allowing you to choose four corners to track. Now you set the tracking points to the corners of the LCD screen and choose to track the motion forward. Once the tracking is finished you will create a new solid the same size as your current comp. Then you will edit the target of your tracking and make sure the new solid is selected as the target. Then apply the tracking data to the solid. This should place your new solid on top of the LCD screen. From there you can Pre-Comp your new solid, leaving the attributes in the current comp, and place whatever you want on the screen! This effect works on any object that you can track....
  • 1 Students
Watch Now
Add to Favourite

After Effects + Cinema 4D Hollywood Sign Tutorial
Views: 78783
Likes: 421

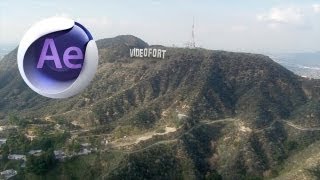
At VideoFort we’ve all seen that iconic helicopter shot over Los Angeles, flying towards the Hollywood sign and wished we could alter what the sign says as easily as prices at the gas pump seem to change. Well, now you can with Dan’s new After Effects and Cinema 4D Hollywood Sign tutorial teaching you how to first create your own ‘Hollywood’ sign and then believably composite it into a helicopter shot of the Hollywood Hills. In this tutorial, Dan will cover 3D Camera Tracking in After Effects and exporting tracking data to C4D. How to create textures from footage in C4D is another rad tip Dan shows us along with creating splines based on camera tracking paths, creating clouds with NURBS and PyroCluster, compositing 3D objects into live-action footage, and much more! For what looks like a complicated effect in the end, Dan makes this one easy to pull off even for the novice C4D and AE artist with his simple step-by-step instructions. Make Hollywood (or any sign) yours with this easy to follow tutorial and VideoFort.com stock footage! For more free vfx tutorials please visit http://www.VideoFort.com. VideoFort: The first ever Royalty Free Stock Footage Library to offer Unlimited Downloads.......
  • 1 Students
Watch Now