Add to Favourite

Cinema 4D: Advanced Lighting Tutorial
Views: 2266
Likes: 15

In this tutorial VideoFort Don from the UK shows you how to light 3D objects using Cinema 4D. In the process you will learn how to place your key light and 3 additional lights in the 3D space to create a natural light look. VideoFort Don starts by placing a key light at a high angle above a 3D object in the composition, this will serve as the main light for the object. He then copies that light making a fill light, which helps soften any hard lines on the object. He then inserts a third light, the backlight. This light creates contrast between the object and the background, bringing life to the scene. Finally VideoFort Don adds a bounce light in front of and below the object. This light also helps soften shadows revealing more detail in the object. He follows up by adding filters to the lights, creating a more natural, and custom look....
  • 1 Students
Watch Now
Add to Favourite

Photography: Time Lapse Tutorial
Views: 2168
Likes: 30

In this tutorial VideoFort Don covers how to shoot a time-lapse using firmware Magic Lantern in lieu of using an intervalometer, which is usually required for time-lapse photography. He also suggests areas and subjects for best time-lapse results. Then he shows you how to bring the photos into After Effects to create your finished time-lapse....
  • 1 Students
Watch Now
Add to Favourite

After Effects: How to Pull a Green Screen
Views: 2148
Likes: 20

In this VideoFort.com After Effects tutorial VideoFort Jon shows you how to remove a green screen using After Effect built in Key Light. With the green screen footage selected, choose KeyLight from the Effects, Keying drop down menu. From there use the eyedropper tool to select a portion of the green screen. Then VideoFort Jon goes through some of Keylight’s setting to make a better green screen pull. After adjusting the settings, add a solid layer and put it underneath the green screen footage. On the new solid’s layer select Alpha Matte underneath the track matte settings. This gives you an outline effect that can be useful for many different projects....
  • 1 Students
Watch Now
Add to Favourite

After Effects: Basic Rendering
Views: 2012
Likes: 15

  In this After Effects Tutorial VideoFort Jon quickly shows you how to render out your After Effects Project. Once you have finished your project, go to Composition, and select either Add to Render Queue or Pre-Render. From there you will be brought to the Render Queue window. Now you can format your video with the correct setting to be exported from After Effects. Once you have the settings, name the file and select where you want to save it. Select the render button and the file will render out to the selected destination. Show us what you can create by posting your projects in the comments!...
  • 1 Students
Watch Now
Add to Favourite

Adobe Premiere: Importing Footage
Views: 1833
Likes: 9

This basic Adobe Premiere tutorial by VideoFort Colin teaches you how to import footage for an edit. This tutorial shows beginners three different ways to import footage into Adobe Premiere so that you can streamline the post production process. This tutorial is simple, easy, and for beginners looking to import and sequence their footage so they can prep for an edit....
  • 1 Students
Watch Now
Add to Favourite

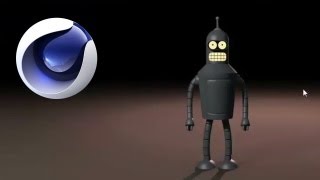
Cinema 4D: Create Bender from Futurama Part 4
Views: 1817
Likes: 11

In this http://www.VideoFort.com After Effects Tutorial Tutorial Series VideoFort Don teaches you how to create Bender, from Futurama, using Cinema 4D. Now that you have the head created we can move on to the torso.Bring up the reference image. Select the bottom portion of the Head using the Rectangle Selection tool and hold control and drag down to bottom to extrude that portion. Then scale out the sides to match Bender. Then select that bottom portion and extrude down the torso. Now you will work to create the door on the torso. You’ll need to use your knife tool to cut out a section on the torso for the door. Then you’ll select some segments and right click and choose to split the segments, this create another instance of your selection. You can now delete the segments on the torso. Use Hyper NURBS to smooth out edges around Bender. What cool effects videos do you create? Post in the comments below! Be sure to Like, Subscribe and head to http://www.VideoFort.com to use amazing videos for your projects!...
  • 1 Students
Watch Now
Add to Favourite

After Effects: Introduction to Basic After Effects
Views: 1778
Likes: 24

In this http://www.VideoFort.com After Effects tutorial VideoFort Jon introduces you to the layout of After Effects to make you comfortable with some basic operations that After Effects has to off. Starting out VideoFort Jon will take you through the layout of the After Effects program starting with the Project window. He shows you how to import media for a project, create folders, and change the names of items imported. He also goes through some of the footage settings and how to adjust them if needed. From there you are taught how to create a new composition for your imported media to go in to. You also learn about the preview window, where you can playback the media in you project. As well as how to change your comp settings once you have created a comp. VideoFort helps film and video makers add entertainment value and increase viewer satisfaction by providing content creators with the best stock footage on the planet. VideoFort is the first all HD subscription-based stock footage provider to offer its members unlimited access to some of the world’s most exclusive content. In addition to high-quality stock footage, VideoFort offers free VFX templates, free filmmaking tutorials, and a.......
  • 1 Students
Watch Now
Add to Favourite

After Effects: How to Animate Using Keyframes
Views: 1740
Likes: 15

In this http://www.VideoFort.com After Effects tutorial VideoFort Jon covers how to set keyframes in the Transform controls to create awesome motion graphics. He starts out by going over the different transform controls: Anchor Point, Position, Scale, Rotation, and Opacity. From there he sets keyframes for the opacity to create a smooth fade in transition. From there he creates position keyframes to create some motion and shows how to make a linear keyframe a bezier keyframe by pressing F9 on the keyboard. He goes on to show you how to copy, paste, and reposition keyframes as you please. Finally VideoFort Jon makes some keyframes on a Fast Blur effect to show that effects can be keyframed in the same manner as the transform controls....
  • 1 Students
Watch Now