After Effects Tutorial: Simple Energy Blast
In this tutorial VideoFort Don shows you how to create a blast effect using motion graphics in After Effects. Start out by making a new comp, VideoFort Don chose a comp size setting of 960 by 540. Then you are going to create a white solid the comps size, name it "Blast", and pre-compose it moving all attributes into the new comp and name the precomp "BlastPre". You need to change the new comp's size so that it is square, VideoFort Don does this by going into the comp's settings and changing its size to 960 by 960, you'll have to do the same for your Blast layer.
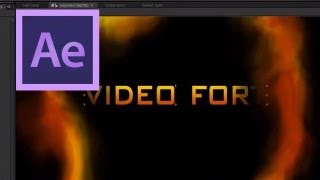
In this tutorial VideoFort Don shows you how to create a blast effect using motion graphics in After Effects. Start out by making a new comp, VideoFort Don chose a comp size setting of 960 by 540. Then you are going to create a white solid the comps size, name it “Blast”, and pre-compose it moving all attributes into the new comp and name the precomp “BlastPre”. You need to change the new comp’s size so that it is square, VideoFort Don does this by going into the comp’s settings and changing its size to 960 by 960, you’ll have to do the same for your Blast layer.
Now that you have the right settings you are going to use your elipse tool and create a circular mask at the center of the Blast layer, then set keyframes so the circle grows from the center and extends past the comp’s frame. Now you need to duplicate the circle, change its mode to subtract, and offset the keyframes so the circles look like a ring growing outward.
Once your keyframes are set you will add a Rougen Edges stylize Effect to your Blast layer. In the Roughen Edges settings increase the border size and reduce the edge sharpness to zero. Next you will add a Turbulent Displace distort Effect and increase the amount to 100 and add the expression (time*250) to the Evolution setting. Then duplicate the Turbulent Displace effect and change its size to 25. You’re almost complete, you just need some color added to your blast.
Next step is to create a new solid and name it Color, then pre-compose it, moving all attributes into the new comp, and name the precomp “ColorPre”. You will then add a Fractal Noise noise and grain Effect to the Color layer. Change the Fractal Type to Dynamic and then go into the effects transform settings and increase its scale to 200. Then add the expression (time*200) to the Evolution settings of the Fractal Noise. Now add the Tint color correction Effect and change the map white to a color of your choice. Then duplicate the Color layer and change the map white to another color and invert the noise. Change the top Color layer’s mode to add and increase the Fractal Noise contrast levels. Go to your BlastPre comp and place your ColorPre comp beneath the Blast layer and change ColorPre’s track matte to “Luma Matte Blast”. You should now have a blast that is your chosen color!
From here you can smooth out some of the details to create a more realistic blast, and add text of your choice. Start out on your blast layer and copy both turbulent displace effects. Then go into the ColorPre comp and paste the effects on both Color layers. This will kill a lot of detail, giving you a nice wispy look. To add text, go into the BlastPre comp and add a new text layer. Duplicate your Blast layer, put it above your text layer, and solo it, this layer will be used as a Luma matte to reveal the text. Remove the first mask layer in the Blast copy layer and change the track matte to Luma Mask Inverted. You can shift the key frames in the Blast layer copy if your text bleeds into the blast. Add a color gradient to add some more style to your blast and you have completed the tutorial.