Cinema 4D: VFX 3D Logos + Light Setup
In this tutorial, VideoFort Don demonstrates how to create a light setup for 3D logos or 3D text using Cinema 4D. Lighting your text or logo is an effective way to help bring more attention and detail to the composition.
In this tutorial, VideoFort Don demonstrates how to create a light setup for 3D logos or 3D text using Cinema 4D. Lighting your text or logo is an effective way to help bring more attention and detail to the composition.
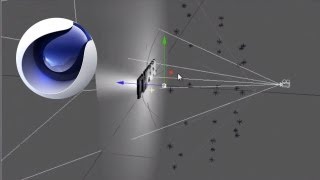
He first starts off by selecting a light and adding it to an array into the composition. The array makes clones of the light and arranges them into a circular shape. He then lowers the intensity of the light and increases the radius of the array. Be sure to change the page rotation of the light to 90 degrees. He then duplicates the light layers and lowers the radius several times. Under each light layer, change the settings under “Shadow” to “Shadow Map (Soft)”. VideoFort Don also increases the contrast of each light to add nice shadows around the letters.
To add better lighting, he adds another light layer past the third set of lights. Set the type of the light to ‘Spot” and increase the width. Under details, change the falloff settings to “Inverse Square Clamped”. Reduce the intensity of the light and increase the contrast to add an ambient lighting to the logo or text. This will help bring more attention to the middle of your frame.
Lastly, create a new light layer and bring it to the top right corner. Change the settings under “Shadow” to “Area”. This creates the effect that the light is beaming down onto the text or logo by adding a drop shadow.
