Cinema 4D: Crystal Texture
In this tutorial, VideoFort Don demonstrates how to create a Crystal Texture for your text or logo. The logo that VideoFort Don uses is created in Cinema 4D, but this effect can be applied to any personal logo or text.He starts off by adding a 3D object under shapes called "Cogwheel" into the composition. Add another 3D object under shapes called "Star". Set the teeth of both objects to "5" and change the radii of the star of make it smaller.
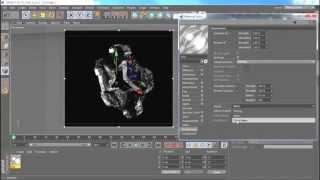
In this tutorial, VideoFort Don demonstrates how to create a Crystal Texture for your text or logo. The logo that VideoFort Don uses is created in Cinema 4D, but this effect can be applied to any personal logo or text.
He starts off by adding a 3D object under shapes called “Cogwheel” into the composition. Add another 3D object under shapes called “Star”. Set the teeth of both objects to “5” and change the radii of the star of make it smaller. Hit “C” to make it editable. Then, connect and delete both of the object’s layers and add “Extrude Nurbs”. Increase the depth of the object’s layer so that its bulky. In the “Caps” settings under Extrude Nurbs, change the Type to “Triangles”. Turn on Regular Grid under Type and increase the width. Hit “C” to make the layers editable. Select all the layers and connect and delete them. Then, go to polygon mode, right-click, and grab the knife tool. Make sure “Restrict to Selection” and “Visible Elements Only” are not ticked. Begin slicing up the 3D object to give it an even more random look. Press Ctrlt+E to select all the segments, right-click, and select “Subdivide”. Set that subdivisions value to 1. That will be enough edges for the 3D object.
Now your object is ready to be deformed. Go to MoGraph and select “Random” under Effector. First, you need to make the Random Effector a child to your 3D object. Then, go to the “Deformer” tab under the Random settings and set that from “Off” to “Polygon”. Under the “Effector” tab, and turn down the strength to help retain the shape of the 3D object. Next, remove the Phong Tag to see the crystal shape on the surface of the 3D object. You can play with the position settings under parameter settings to change to look of the crystal surface.
Our final step is creating a texture for our 3D object. Double-click in the material editor to add a texture. Turn on the transparency in the material editor settings and place it into the 3D object layer. Turn on your Interactive Render by pressing “Alt-R” and put the quality slider at the top. Under the Specular settings, lower the inner width and turn up the height and width. To clean up the edges, go to “Anti-Aliasing” under the Render settings and change the Anti-Aliasing from “Geometry” to “Best”, then lower the threshold.