After Effects: Animate Still Photos Tutorial
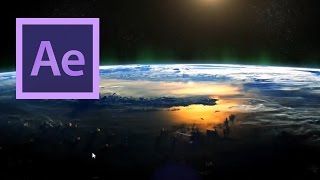
In this tutorial, VideoFort Don demonstrates how to animate still images, giving them life using After Effects. VideoFort Don uses an image of the Earth to create a movement over the planet that includes a moving sun and an aura effect.
In this tutorial, VideoFort Don demonstrates how to animate still images, giving them life using After Effects. VideoFort Don uses an image of the Earth to create a movement over the planet that includes a moving sun and an aura effect.
First, he starts off by dropping the image into a new composition. Using the pen tool, he cuts out the planet and rotates it slightly to make it level. Pre-compose that image along with its attribute into a new composition. Duplicate that composition and select the bottom composition. Right-click that composition and select Box Blur under Blur and Sharpen in Effects. Increase the radius and iterations and click on “Increase edge pixels” to give you a glow around the edge of the Earth.
Next, you want to make that edge around the Earth more blue. To do this, select CC Toner under Color Correction in Effects. Select the color blue in the midtones and the highlights. Change the mask Feather to soften the edge. This will give it a more atmospheric look. Now, to add the starfield in the back, you want to pre-compose a new solid layer. To create the stars, add “Fractal Noise” under Noise and Grain in Effects. Duplicate the stars layer and set the blending mode to “Add”. Select areas in that layer to make brighter by drawing masks around the comp and turning up the brightness. To get rid if the harsh edges, turn up the mask feather. Add a “Glow” under Stylize in Effects and turn down the threshold to add more haze to the starfield.
To create the aura effect, VideoFort Don starts off by pre-composing a new solid layer. He then adds Fractal Noise under Noise and Grain. Hold Alt and click on the “Evolution” timer to enter in the value “time*50”. This will create a continuous animation that won’t end. Next, add a “CC Radial Blur” under Blur and Sharpen in Effects. Change the type to “Straight Zoom” and pull the anchor point straight down to get angled strokes. Grab the pen tool on the aura layer and draw a random mask around the edge. Feather the edge to get the aura effect that is constantly moving. Go to “CC Toner” and change the midtones to green and the highlights to black.
Lastly, we want to add a sun. Create a new solid layer and put it above the other layers. To add the sun, select “Optical Flares” under Video Copilot in Effects. Under the presets menu, select “Real Sun” and change the blending mode to “Add”. At frame 0, set the position to where you want the sun to start. Fast forward to 5 seconds to set the second keyframe and change the position. At that keyframe, move the sun to where you want it to end. Pre-compose all the layers except for the stars and sun. Set the anchor point in that layer to the top of the edge where the aura meets the Earth. At frame 0, add a keyframe for scale. Fast forward 5 seconds and set the second keyframe for scale to 135%. Add a “Corner Pin” under Distort in Effects to give the Earth a 3D movement.